Last updated: September 8, 2021
The other day I got a question from a friend of mine:
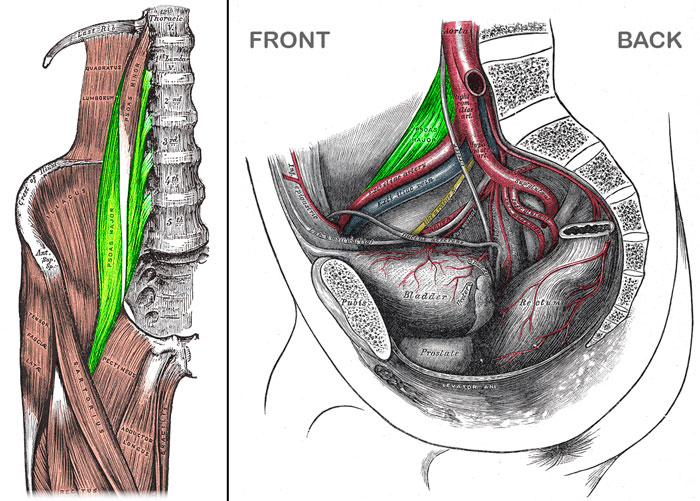
“Hey man my hip flexor, mainly my psoas is tight. Need some advice on how to loosen up. Also I think my pubis symphysis is out of line to”
When I asked how he knew his psoas was the problem, he said:
“A. It hurts B. Watching videos of me standing up Oly lifts out of the hole show I don’t hit full hip extension”
I thought I would answer this question publicly because it’s a common misconception in the fitness industry.
This post will show you when stretching is a waste of your time and when stretching is bad for you. And even when you might want to incorporate it. Spoiler alert: it depends.
Logic Through Rationale A
Hurting in the hip region does not mean there’s a psoas problem. Many people would have what most describe as a “tight hip flexor” but don’t hurt in that region.
Also, this pain does not mean the psoas is causing the problem. The psoas could be (and likely is) an adaptation of a broader problem.
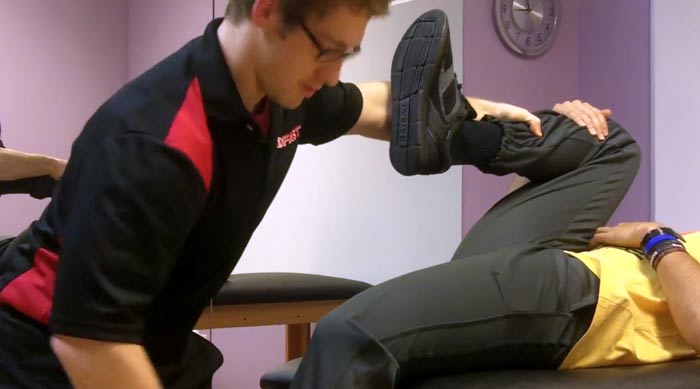
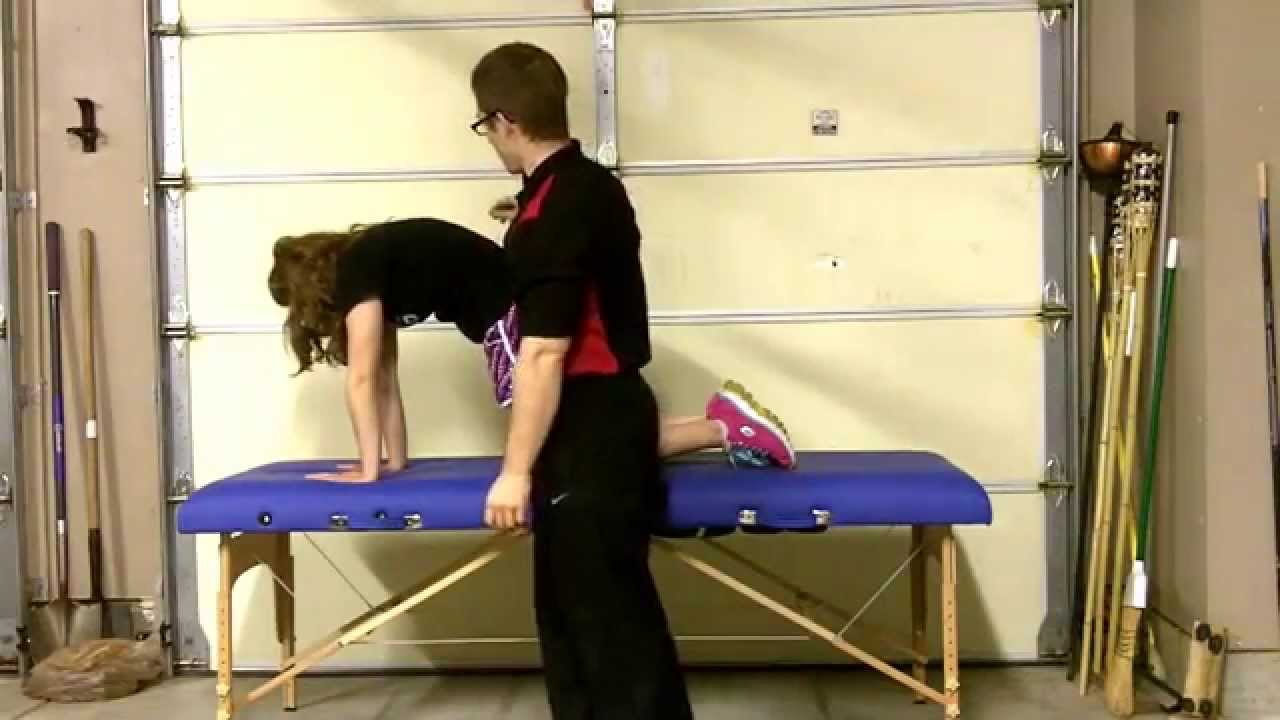
To figure out if the psoas is really stiff, many people will perform a Thomas Test. One leg is fixed up into flexion to secure the sacrum to the table, while the other is brought down into extension while maintaining 90 degrees of knee flexion. Straightening the knee allows me to differentiate between the rectus femoris and the psoas by shortening the rectus femoris, but not the psoas. If full hip extension is then achieved, the problem is a stiff rectus femoris, not a stiff psoas.
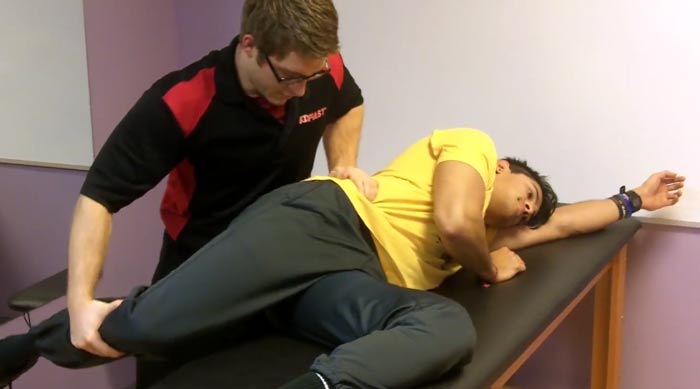
However, the commonly accepted results from the Thomas Test assume a neutral position of the pelvis. That is, they assume length-tension relationships that are like what you see in anatomy textbooks. This is hardly ever the case. I also need to know the position of your pelvis. For this, I’ll just use an Ober’s Test. If you can’t adduct in the Ober’s Test, then I know that half of the pelvis is tilted forward and externally rotated. I have a video of me performing these tests on Jess later in this post.
Logic Through Rationale B
When I asked him for a picture of what he meant by his second rationale, he sent me this:
What he’s showing me can be interpreted as both a hip extension limitation as well as a shoulder flexion limitation, though he’s specifically focusing on the hips. The issue is that people focus on the obvious symptoms, like limited hip extension or limited shoulder flexion. I did this for years and it was very helpful in forming my framework for movement dysfunction. I now, however, prefer to look at what is linking the hip and the shoulder: the core.
The middle of the body requires stability before the hips and shoulders can demonstrate mobility, strength, and power.
My friend does not have core stability because he always uses an extension pattern for stabilization. This is necessary under big weights, but too much steals range of motion elsewhere (in this case, at the hips and shoulders). You cannot get away with this extension stabilization in Olympic lifting to the same degree that you can in, say, powerlifting because more mobility is required. Those who stabilize in excessive extension lock up their mobile joints (hips, shoulders) and start asking for the immobile joints to provide the extra range of motion (back, SI joint).
This ties back into the Thomas Test scenario we were just talking about: I don’t get an accurate representation of your mobility if I don’t know what position you’re in. So the first thing we need to do determine your position.
Determining Position
Can you adduct and internally rotate your hips? These are my first two questions.
For shoulders, I want to know if you can internally rotate, flex, or horizontally abduct. I can also press on your rib cage to see how well it goes down (internal rib rotation). If I fix those ribs down with my hands, I can have you take a breath and see if you can breathe into the opposite side.
The body is naturally asymmetrical. To understand this, you first need to accept that the most important goal of our subconscious mind is to breathe. Without oxygen, the brain quickly dies.
So the position of the diaphragm is important because that muscle is our primary breathing muscle. With opposition from the abdominals, the diaphragm maintains a dome shape. It’s attachment sites become fixed and the muscle is able to pull on the bottom of the lungs, increasing their volume. This increase in lung volume creates a pressure gradient that pulls air into the lungs.
With a malpositioned diaphragm, breathing becomes harder. In an extension pattern, the diaphragm shortens, flattens out, and extends the spine. The extension of the spine drives the rib cage up, and this becomes the means for increasing lung volume.
One of the main components of the body’s asymmetry is in the diaphragm. The right half is larger than the left half. These asymmetries, coupled with the fact that breathing is the most important goal we have, make us prone to being on our right side.
So we like to position our larger right diaphragm because it can handle our breathing. We’ll use the left half for holding ourselves up. Subsequently, the right ribs go down easier, while the left ribs don’t go down very well at all.
If I have this side-to-side asymmetry present, I’ll expect limitations in:
- L hip adduction, IR, and possibly extension
- R shoulder IR
- L shoulder flexion and horizontal abduction
All of these limitations assume there is normal bodily tissue length because the block is secondary to position of the fossa (shoulder or hip socket). These limitations can be on both sides, especially if I have someone who lifts heavy weights consistently.
For more on this, I highly recommend the Postural Restoration Institute (PRI), as they offer the most specific interpretation of test results that I’ve mentioned.
Once I find out if my client likes their right side or their back (or is neutral, but that’s unlikely upon a first evaluation), then I have a rationale for cleaning it up.
Interpreting the Thomas Test
If I have a client who likes using their back muscles, I hope to see limitations in hip extension on both sides. This is secondary to the position of the pelvis and its acetabulum.
If I have a client who really likes staying on their right side, I hope to see limitation in hip extension on the left side. Again, this is secondary to the position of the pelvis and its acetabulum.
I say “hope” because there is a bony block that works together with the anterior hip ligaments. If I have full hip extension, but poor position (i.e. I can’t adduct my hip), then these anterior hip ligaments have become compromised in order to achieve “fake” hip extension. We call this a “pathology”. Pathology is common, but makes it harder to reposition and make the repositioning stick. Sometimes the back of the hip capsule will tighten up as well to accommodate for the loose front side. My treatment strategy will be different for people with pathology because I need to prioritize getting them into the back of their left hip. Initially, I will focus more on facilitating left hip internal rotators than the right side external rotators.
This problem could be present on both sides, though it is less common.
What position was Jess in? Take a look at the following video:

Jess cannot adduct on either side, but he can extend on both sides. This means his anterior hip ligaments can’t do their job quite as well as they once could.
It is important to note that he may still have stiff hip flexors even though he has full hip extension. For this scenario, I need to facilitate the abdominals to provide a flexion torque that fixes the spine. This will lengthen the hip flexors, because they extend the spine. Only once I do that can I worry about making the hip flexors longer by extending the hip. This progression may not happen in one day.
Recap:
- Use abs to fix the spine (see “clean up the core” below)
- Then learn how to extend the hip
Step one may take anywhere from five seconds to several weeks. Only after successfully accomplishing step one do I care about moving on to step two. I’ll give you some more exercises to fix this later in the post.
How to Clean Up the Core
First, we need to define the core. For me, this means anything directly attached to the spine. There are three main “rudders” that steer the body’s metaphorical ship: the sacrum, the sternum, and the sphenoid. This post will not discuss the sphenoid, but that doesn’t mean you shouldn’t learn about it.
What do I need to do to reposition the core?
- Posteriorly rotate each half of the pelvis (maybe only the left side)
- Internally rotate the ribs (maybe only the left side)
Even if I have to do this on both sides at first, like I do with Jess, the natural asymmetry of the body still underlies. So eventually, I will have to place more emphasis on that left side.
How do I reposition a front-to-back asymmetrical core?
- Shut off paraspinal back muscles
- Get abs on abs on abs on abs
- Reeeaaaaaaach to get both serratus anterior muscles
The first exercise I tried with Jess is a mouthful: the Supine Hemi Extension with Alternating Respiratory Rectus Femoris and Sartorius. I usually just call this “The Hemi.” This exercise alone was enough to restore position of Jess’s pelvis.

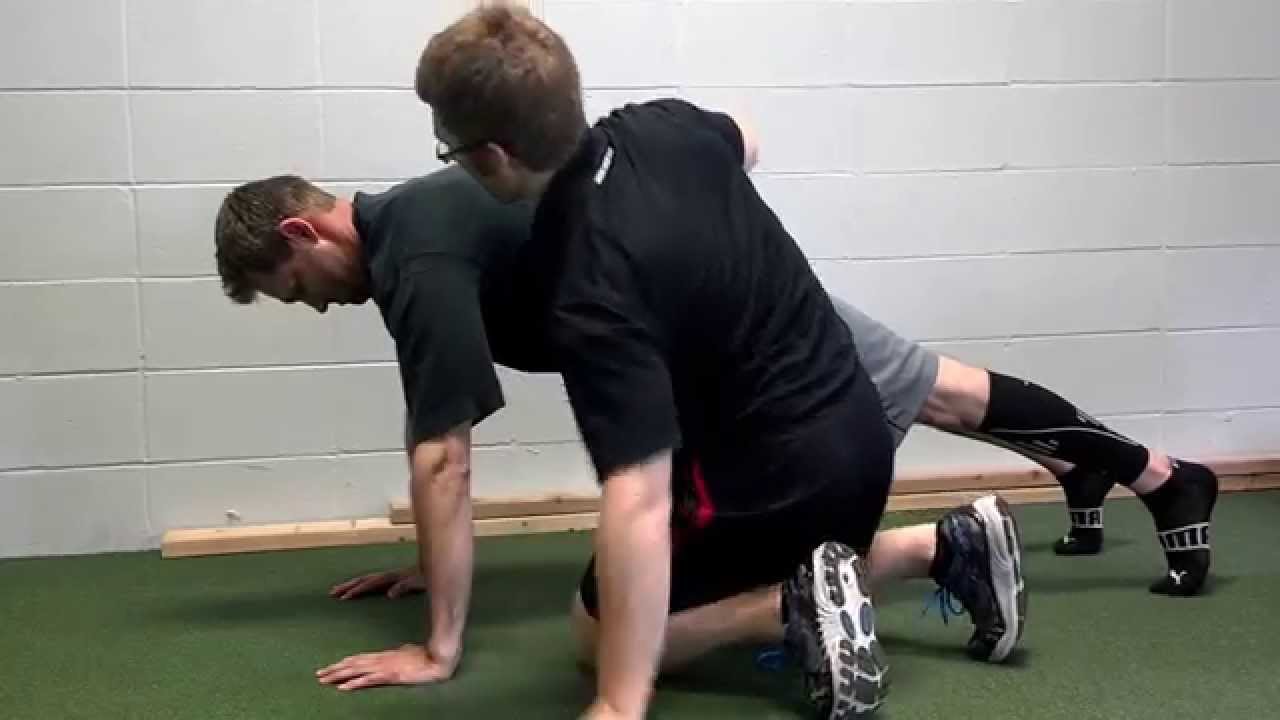
Another great one exercise (also stolen from PRI) is the all four belly lift. Here’s a video I made that shows this exercise and its various progressions. Pick the level you can perform successfully to see maximum progress.
Push ups are a great supplement to add into your training program, but you have to make sure you reach your arms long through the ground at the top of the movement.
How do I reposition a side-to-side asymmetrical core?
- Inhibit the muscles of right stance by facilitating the left biceps femoris, left ischiocondylar portion of adductor magnus, and right gluteus maximus. This brings my hips over to the left side.
- Inhibit the right side muscles that pull my thorax into right stance by facilitating the right lower trapezius, right serratus anterior, right side external rib rotators, and left abdominals.
The purpose of repositioning is to inhibit the muscles that hold me on the right side. Facilitating muscles is secondary to inhibition.
My go-to exercise here is the 90-90 hip lift with balloon.

There are endless repositioning exercises, and I won’t always choose the one above. This post will not go into all possible derivations of repositioning.
Exercises to Inhibit the Hip Flexors
Remember the steps we talked about earlier:
- Use abs to fix the spine
- Then learn how to extend the hip
The Hemi (video above) uses reciprocal inhibition and the crossed extensor/withdrawal reflexes to shut off the hip flexors. If I give someone a different exercise for repositioning, I may add The Hemi in afterwards to further inhibit their hip flexors while reinforcing the correct position of the pelvis and rib cage.
The kettlebell pullover is another great exercise to learn how to fix the rib cage down and tilt the pelvis back. It is a core exercise, not a lat exercise.

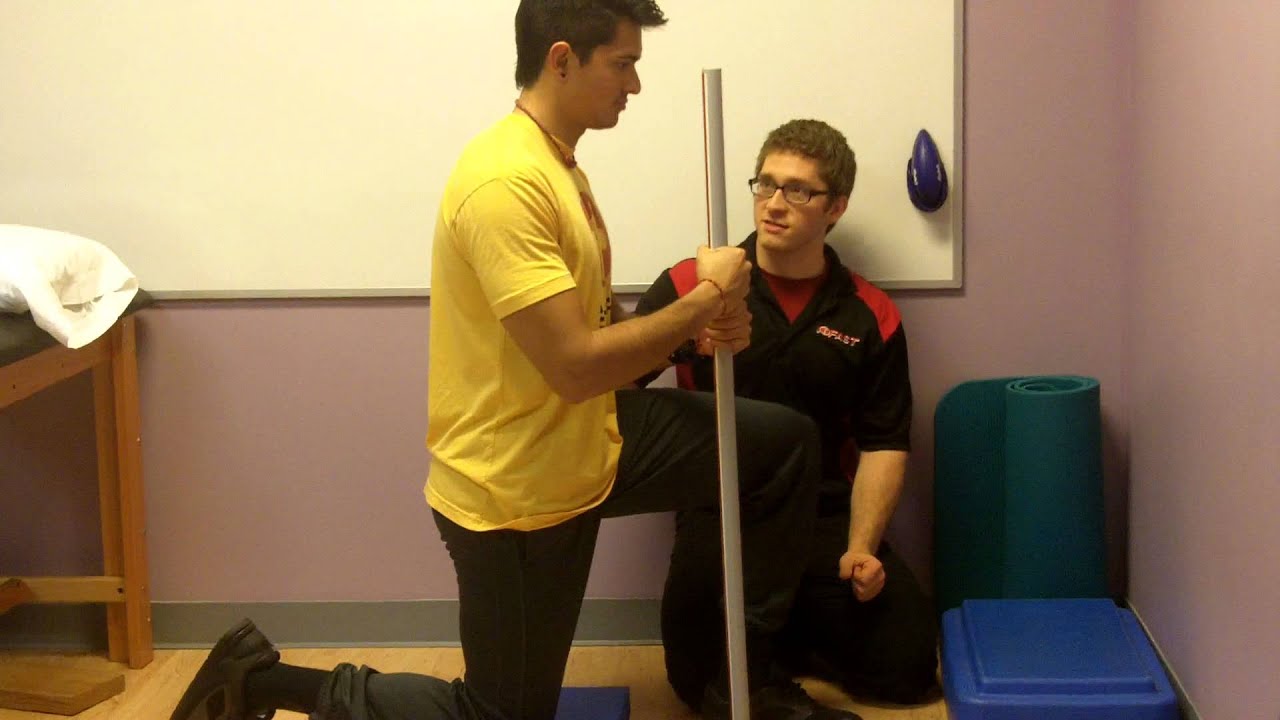
Lastly, you can perform a standard hip flexor stretching in a half kneeling position using a stick or table to help facilitate the abs while actively roll your pelvis back (posterior pelvic tilt). Hip flexors stretches are constantly done incorrectly all around the world. We need to talk about why.
The Wrong Way to Lengthen the Hip Flexors
Many, MANY people all over the place will set up for a hip flexor stretch on one knee, then drive their hips way forward. They claim they are stretching their hip flexors.
I have bad news: they are not stretching their hip flexors. 10 degrees of hip extension is normal. Many of these people shove far beyond this range.
Where is this motion coming from?
Recall our talk on position. If you don’t have opposition from the abdominals, there is nothing to fix the spine. The hip flexor pulls the spine into extension. These people are getting “fake” hip extension that is actually back extension.
The pelvis is also out of position. Pop quiz, now’s your time to shine: What happens when the pelvis is out of position?
That’s right, hip extension is blocked by the acetabulum. So you’re forcing yourself into more “fake” hip extension. You’re stretching your anterior hip capsule, not your hip flexors. You are creating pathology. You are making yourself harder to fix.
Instead, use a stick or table like we just talked about to get into the right position and facilitate your abs.
I may want to stretch someone, but I can’t make that decision until I’ve fixed the position of the pelvis.
Test-Treat-Retest
I need to make sure I’m making Jess better. To do this, I will use my tests and have him test out the movement in question. I did both of these before providing any intervention like The Hemi. Once I give him an exercise (the intervention), I will retest to see if it worked.
With Jess, The Hemi cleared up his Ober’s Test.
Then I will have him try his overhead lockout again and see if it feels better. I did just that, and here’s how it went.

That’s how I know I’m helping him and not just living in delusions.
From here, he’ll need to be consistent with his exercises (do The Hemi 1x/day if possible). If he does these exercises before he does his lifting, now he has access to motion that he previously could not access. Now he’ll need to learn to feel the new pattern during his lifts. As is always important with the Olympic lifts, he will need to refine his technique to get used to his new body.
Take Home Summary
I hope this helps tell you understand when to stretch your hip flexors and how to do it. Remember:
- Test your movement in question and determine what position you’re in
- Right-side dominant
- Back dominant
- Neutral
- Reposition your core
- Left hamstrings, left ischiocondylar portion of adductor magnus, and right glute max
- Shut off back, turn on abs, and reaaaaach
- You’re already repositioned!
- Only then do you worry about trying hip flexor stretches or other hip flexor inhibition techniques
- Redo your tests
- If repositioning worked, keep the exercise and move on
- If it did not work, try something else
If you have questions about anything, leave them in the comments below.
FREE Bonus Complete with Outtakes
Want more? Here’s a video of the whole process. Sometimes it’s easier to understand when you’re there watching everything happen.
Here’s the video version of this post.
Go watch that FREE video and then make the world a better place!
—-
Header photo courtesy of Allen Tucker.
Add some color to this commentary.